
100% disk usage in Windows 11 is a common problem that can cause extreme slowdowns, freezing, and long boot times. If Task Manager shows your disk stuck at 100%, follow this step-by-step guide to fix high disk usage and restore normal system performance.
What Causes 100% Disk Usage in Windows 10?
Common causes include:
- SysMain (Superfetch) service
- Windows Search indexing
- Outdated or corrupt storage drivers
- Failing hard drives (HDD)
- Malware or background processes
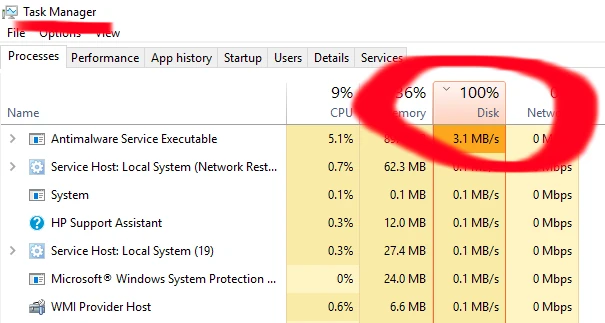
Step 1: Check Disk Usage in Task Manager
- Press Ctrl + Shift + Esc
- Open the Processes tab
- Check the Disk column
Step 2: Disable SysMain and Windows Search
These services frequently cause high disk activity.
- Press Win + R, type
services.msc - Stop SysMain
- Stop Windows Search
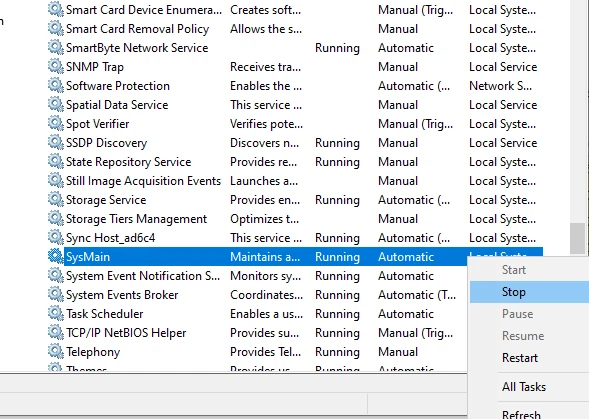
Restart your PC and check if disk usage drops.
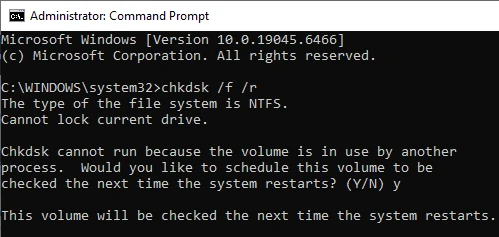
Step 3: Check and Repair Disk Errors
- Open Command Prompt (Admin)
- Run:
chkdsk /f /r - Restart when prompted or restart manually.
Step 4: Disable Startup Programs
Too many startup apps can overload your disk.
- Open Task Manager
- Go to the Startup tab
- Disable unnecessary programs that you recognize (Don't disable any system services or anything you don't recognize)

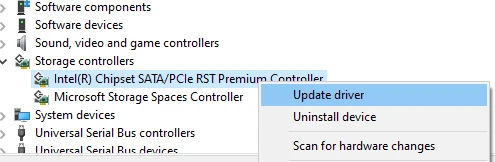
Step 5: Update Storage Drivers
Outdated SATA, AHCI, or NVMe drivers often cause disk issues.
- Open Device Manager
- Expand Storage controllers
- Update drivers
Step 6: Scan for Malware
Malware can cause constant disk activity.
- Open Windows Security
- Run a Full Scan
Final Solution: Upgrade to an SSD
If you’re using a traditional HDD, upgrading to an SSD will cut down access times and probably the most effective long-term fix for 100% disk usage in Windows 11 or Windows 10.
Summary
✔ Stops disk usage spikes
✔ Improves Windows OS performance
✔ Fixes freezing and slow boot issues