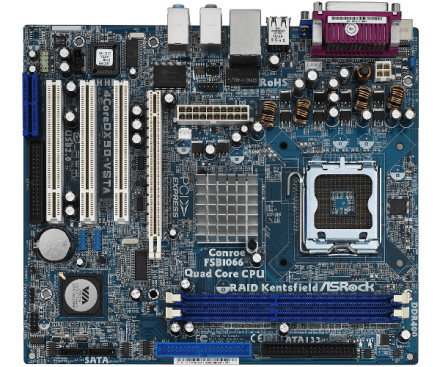
ASROCK 4COREDX90-VSTA R2.0 BIOS 1.50
File: 4CoreDX90-VSTA(R2.0)(1.50)Win.zip
SHA-256 Checksum:
ae96d21a962c94e48e24fd030fc4d938858a84339a0fbaed820122778106b451
ASROCK 4COREDX90-VSTA R2.0 BIOS 1.50
File: 4CoreDX90-VSTA(R2.0)(1.50).zip
SHA-256 Checksum:
090a53bb0794e4dbb85616afeb2742f5a3c964c86f0c0edcff60bebe16e68d19
ASROCK 4COREDX90-VSTA BIOS 1.30
File: 4CoreDX90-VSTA(1.30)Win.zip
SHA-256 Checksum:
8d17bce01df7c11af94cdeb11864b8a767e802ff8f40a762678e4e2cf487cf43
ASROCK 4COREDX90-VSTA BIOS 1.30
File: 4CoreDX90-VSTA(1.30).zip
SHA-256 Checksum:
91f491e18673d8452cffb03757d1219920a181cb9c095e93fbaeddb39e1ae881
Documentation
ASROCK 4COREDX90-VSTA User Manual
(702.69 KB)
Install Instructions
ASRock instant flash Method 1:
- Save the BIOS files on a device such as USB disk (FAT32 format), hard disk (FAT32 format) and floppy drive.
- Press [F2] during POST to get into BIOS setup menu.
- Select the Instant Flash utility under [Tool] menu to execute it.
- ASRock Instant Flash will automatically detect all devices and only list those BIOS versions which are suitable for your motherboard.
- Select the suitable BIOS version and flash.
ASRock instant flash Method 2:
- Save the BIOS files on a device such as USB disk (FAT32 format), hard disk (FAT32 format) and floppy drive.
- Press [F6] when you see this (or similar) page.
- Select the suitable BIOS version and flash.
ASRock DOS BIOS Upgrade:
- Create a bootable system USB pen drive.
- Download an updated ASRock BIOS file (WinZip format with .zip file extension) from the web site, unzip the BIOS file and save all files to the drive you created in step 1.
- Boot from the disk you created in step 2.
- At the "A:" prompt, type BIOSfile.exe, then press [Enter]. For example: A:H87Pro~1.exe [Enter] then you will see program is finding model name; after finish please press any key to reboot.
- After system restart, it will auto update BIOS, please DO Not power off during UEFI update.
- After finishing upgrading the BIOS, it shows "Press Enter". Please press “Enter” then reboot.
- After system restart, press [F2] to enter the BIOS setup utility during boot up. In Exit menu, please select "Load Default Settings" and press [Enter] to continue.
- Select "Exit Saving Changes" and press [Enter] to exit the BIOS setup utility.
- Now, system is booting up with new BIOS.
ASRock Windows BIOS Upgrade:
- Download the BIOS package (WinZip format with .zip file extension). And close all programs.
- Unzip and save all files to the same directory of any storage location accessible by the host system. And you should see BIOSfilename.EXE.
- Click BIOSfilename.exe
- It shows a dialog icon to remind that "You need to restart the system before updating BIOS, do you want to restart now". Click "Yes".
- After system restart, it will auto update BIOS. Please DO Not power off during UEFI update.
- After finishing upgrading the BIOS, it shows "Press Enter". Please press “Enter” then reboot.
- After system restart, press [F2] to enter the BIOS setup utility during boot up. In Exit menu, please select "Load Default Settings" and press [Enter] to continue.
- Select "Exit Saving Changes" and press [Enter] to exit the BIOS setup utility.
- Now, system is booting up with new BIOS.