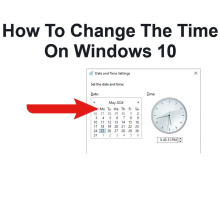
Setting up Date and Time in Windows
If your Windows 10 clock is showing the wrong time or date, it can cause problems with websites, Microsoft services, game launchers, email synchronization, and software activation. Fortunately, Windows 10 includes several easy ways to adjust the system clock manually or automatically.
This guide explains how to change the time, date, and time zone on Windows 10, along with troubleshooting steps for clocks that refuse to stay accurate.
Method 1: Automatically Set the Time on Windows 10
Automatic synchronization is the easiest and most reliable option for most users.
Steps
- Right-click the clock in the bottom-right corner of the taskbar
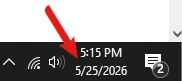
- Select:
Adjust date/time
Image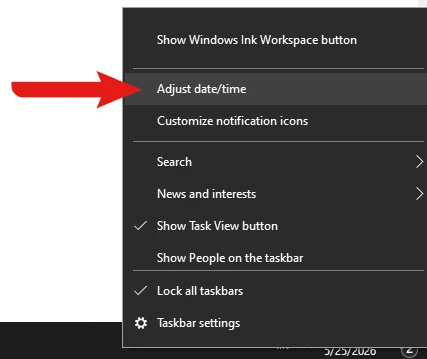
- Enable:
- Set time automatically
- Image
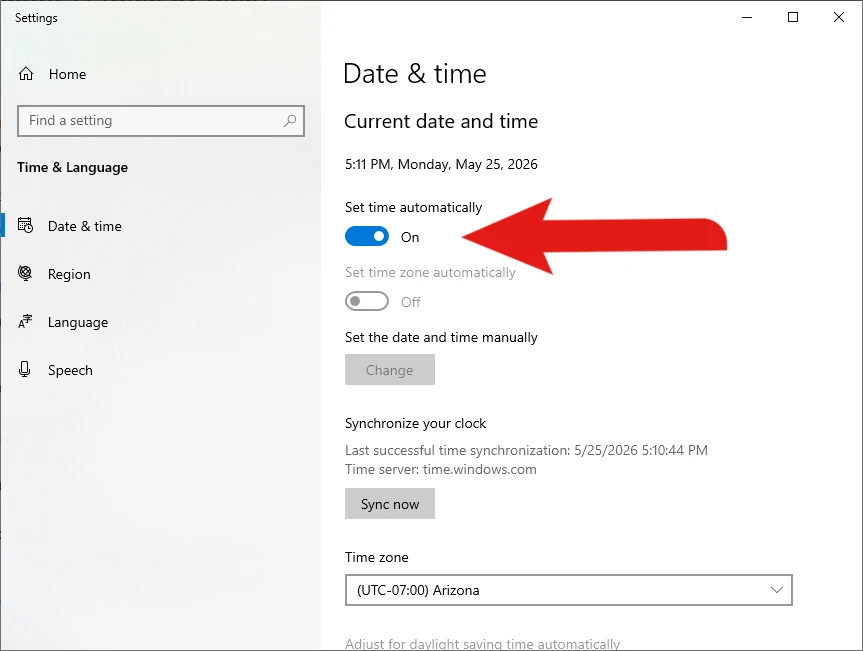
- Enable:
- Set time zone automatically
Windows 10 will now synchronize your clock using internet time servers.
Manually Sync the Clock
If the displayed time still appears incorrect:
- Open:
- Settings > Time & Language > Date & Time
- Scroll down to:
- Synchronize your clock
- Click:
- Sync now
- Image
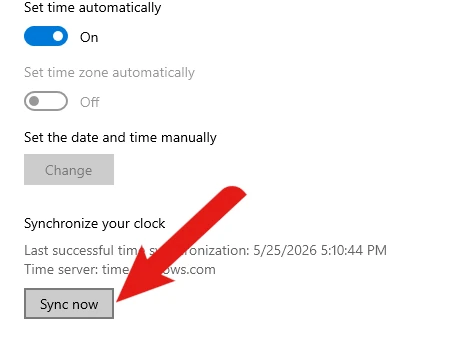
Windows will immediately attempt to correct the time.
Method 2: Setting your time and time zone manually
You can manually enter the correct date and time if automatic sync is disabled.
Steps
- Right-click the taskbar clock
- Select:
- Adjust date/time
- Disable:
- Set time automatically
- Under:
- “Set the date and time manually”
- Click:
- Change
- Enter the correct:
- Date
- Time
- Click:
- Change
The new time settings will apply immediately.
How To Change the Time Zone
An incorrect time zone is one of the most common causes of clock errors.
Steps
- Open:
- Settings
- Select:
- Time & Language
- Click:
- Date & Time
- Locate:
- Time zone
- Choose the correct region from the dropdown list
Common US time zones include:
- Pacific Time
- Mountain Time
- Central Time
- Eastern Time
Enable Daylight Saving Time
Windows 10 can automatically adjust for daylight saving time changes.
Steps
- Open:
- Date & Time settings
- Turn ON:
- Adjust for daylight saving time automatically
Change Time Using Control Panel
Some users prefer the classic Control Panel interface.
Steps
- Press:
- Windows + R
- Type:
control
- Press Enter
- Open:
- Clock and Region
- Select:
- Date and Time
- Click:
- Change date and time
Fix: Windows 10 Clock Keeps Resetting
If your clock constantly changes or resets after rebooting, try the following fixes.
Fix 1: Replace the CMOS Battery
The CMOS battery maintains the motherboard clock when the PC is powered off.
Signs of a failing CMOS battery include:
- Incorrect date after startup
- BIOS settings resetting
- Clock drifting frequently
Most desktop PCs use a CR2032 coin battery.
Fix 2: Restart the Windows Time Service
- Press:
- Windows + R
- Type:
services.msc
- Locate:
- Windows Time
- Double-click it
- Set:
- Startup Type = Automatic
- Click:
- Start
Fix 3: Use Internet Time Servers
- Open:
- Control Panel
- Go to:
Date and Time
Image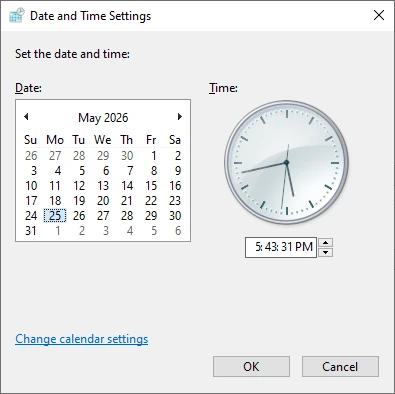
- Open:
Internet Time
Image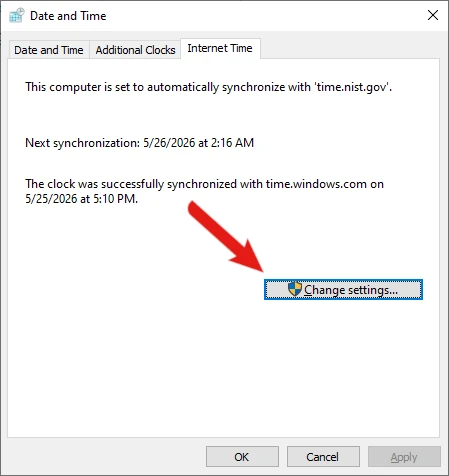
- Click:
- Change settings
- Enable:
“Synchronize with an Internet time server”
Image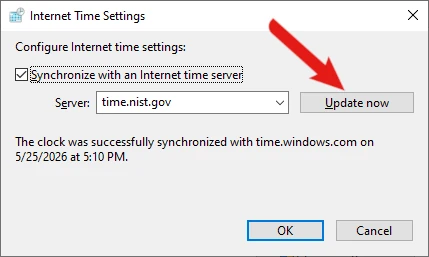
Popular time servers include:
time.windows.com
pool.ntp.org
How To Change the Clock Format
Windows 10 supports both 12-hour and 24-hour clock formats.
Steps
- Open:
- Settings
- Select:
- Time & Language
- Click:
- Region
- Open:
- Change data formats
- Select:
- 12-hour or 24-hour time format
Why Accurate Time Matters
Incorrect system time can lead to:
- SSL certificate errors
- Microsoft account sign-in issues
- Steam or online gaming problems
- Windows Update failures
- OneDrive sync issues
- VPN connection errors
Even being off by a few minutes can affect secure online services.
Final Thoughts
Changing the time on Windows 10 is usually quick and simple. In most situations, enabling automatic time synchronization and selecting the correct time zone solves the problem immediately.
If your clock keeps drifting or resetting, the issue may involve Windows services, internet synchronization settings, or a failing CMOS battery inside the computer.