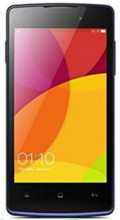
Oppo R1011 USB Drivers will help your Windows computer recognize your Android device. Then you can transfer files from computer to Android or even install the stock or custom ROM to your Android device.
Basic Information
Manufacturer: Oppo
Model: Joy plus
Launch date (global): 4/20/15
Operating system: Android
Os version: 4.4.2
Type: Smartphone
Status: Available
Colors: default
Product Name: Oppo Joy Plus
Display
Screen size (in inches): 4
Display technology: IPS LCD Capacitive touchscreen
Screen resolution (in pixels): 480 x 800
Pixel Density (PPI): 233
Scratch Resistant Glass: No
Camera
Rear Camera Megapixel: 3
Maximum Video Resolution (in pixels): N/A
Front Camera Megapixel: 0.3
Front Facing Camera: Yes
LED Flash: Yes
Video Recording: Yes
Geo-tagging: No
Digital Zoom: No
Autofocus: No
Touch Focus: No
Face Detection: No
HDR: No
Panorama Mode: No
Battery
Battery capacity (mah): 1700
Talk time (in hours): 5
Removal Battery (Yes/No): N/A
Sensors and Features
Multi touch: Yes
Light Sensor: No
Proximity Sensor: Yes
G (Gravity) Sensor: No
Finger print sensor: No
Orientation Sensor: No
Accelerometer: Yes
Compass: No
Barometer: No
Magnetometer: No
Gyroscope: No
Dust proof and water resistant: No
Connectivity
SIM: Dual
3G Capability: Yes
4G Capability: Yes
Wifi Capability: N/A
Wifi HotSpot: Yes
Bluetooth: N/A
NFC: N/A
GPS: Yes
DLNA: N/A
HDMI: N/A
technical specifications
Cpu: MediaTek MT6572
CPU speed: 1.3 Ghz
Processor cores: Dual
RAM: 1 GB
Gpu: Mali 400 MP 1
Dimensions (lxbxh- in mm): 124 x 63 x 9.9
Weight (in grams): N/A
Storage: 4 GB
Removable storage (yes or no): Yes
Removable storage (included): N/A
Removable storage (maximum): 32 GB
Step 1 — Download and extract the Android USB Driver to your PC.
Step 2 — Click Start (Windows) -> Control Panel -> Device Manager (Select Device Manager).
Step 3 — On the Device Manager window find and click on computer name to select Add legacy hardware.
Step 4 — Select Next
Step 5 — Selext Install the hardware that I manually select from a list (Advanced), and click the Next
Step 6 — Select Show All Devices afterward click Next button again.
Step 7 — Click the Have Disk button.
Step 8 — Click Browse button to find the extracted Android ADB Driver -> android_winusb.inf and click on Open.
Step 9 — Click OK.
Step 10 — Now select the Android ADB Interface -> click Next button.
Step 11 — Click Next button again.
Step 12 — Windows Security box will appear, to confirm whether you really want to install the Android USB Driver, so just choose the Install this driver software anyway.
Step 13 — Once you clicked the Finish button, then repeat from step 2 to choose Android Composite ADB Interface.
Step 14 - Done.