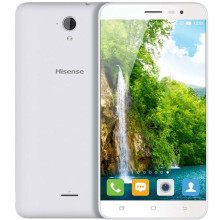
The Hisense F20T is a versatile and feature-packed smartphone that combines affordability with modern capabilities. With a sleek design and a 5.5-inch HD+ display, it offers a vibrant and immersive visual experience. The device is powered by a reliable octa-core processor, ensuring smooth multitasking and responsive performance.
The camera system includes a 8MP main camera, capable of capturing sharp and clear photos, and a 5MP front camera for selfies. The Hisense F20T runs on Android, providing access to a wide range of apps and services.
Its long-lasting battery and efficient power management enable extended usage, while expandable storage options ensure ample space for photos, videos, and apps. The Hisense F20T is an affordable and capable smartphone suitable for various users' needs.
USB Driver can be used to do technical functions such as installing custom OS roms and other advanced features.
Android ADB USB Driver (For connecting to PC)
File: latest_usb_driver_windows.zip
1ee1d023a99ffac962af4454eb9b9900f6858c687b4d5311e8fb361548d6c078
Android CDC USB Driver (For Flashing Firmware)
File: android-cdc-driver.zip
2131eae076c922961c83f77f9b9e0a05f08cfe9d5e27118710997ee663e68549
Android VCOM USB Driver (For Flashing Firmware)
File: android-vcom-driver.zip
74ebd540d47e200e07ba18853bd07ed3a7576cb3cf63d8f6dccad2538f7232aa
Android ADB and Fastboot Drivers
File: adb-setup-1.4.3.zip
2fd87bf2b33b4731e69bb12b8bb2366ec788d0496d9f70e23858a0e736ccdc3d
MTK VCOM USB Drivers
File: Windows-10_MTK-VCOM-USB-Preloader-Drivers.zip
dd755bd4ed8173b9aa4dc488deb57a17c58806ade3c708c1918f21ec8ddfad69
Step 1 — Download and extract the Android USB Driver to your PC.
Step 2 — Click Start (Windows) -> Control Panel -> Device Manager (Select Device Manager).
Step 3 — On the Device Manager window find and click on computer name to select Add legacy hardware.
Step 4 — Select Next
Step 5 — Selext Install the hardware that I manually select from a list (Advanced), and click the Next
Step 6 — Select Show All Devices afterward click Next button again.
Step 7 — Click the Have Disk button.
Step 8 — Click Browse button to find the extracted Android ADB Driver -> android_winusb.inf and click on Open.
Step 9 — Click OK.
Step 10 — Now select the Android ADB Interface -> click Next button.
Step 11 — Click Next button again.
Step 12 — Windows Security box will appear, to confirm whether you really want to install the Android USB Driver, so just choose the Install this driver software anyway.
Step 13 — Once you clicked the Finish button, then repeat from step 2 to choose Android Composite ADB Interface.
Step 14 - Done.