Realtek audio drivers are used in millions of laptops, desktops, and motherboards. If your Windows 11 PC has no sound, crackling audio, missing microphone support, or broken headphone detection, reinstalling the Realtek audio driver often fixes the issue.
This guide explains how to install Realtek audio drivers on Windows 11 step-by-step, including how to identify your hardware, download the correct drivers, and fix common Realtek audio problems.
What Are Realtek Audio Drivers?
Realtek audio drivers allow Windows 11 to communicate with your PC’s onboard sound hardware. Most modern systems use a Realtek High Definition Audio chipset integrated into the motherboard.
Realtek drivers handle:
- Speaker output
- Headphone detection
- Microphone input
- Front audio jacks
- HDMI audio passthrough
- Audio enhancements
- DTS or Dolby features
Without the proper driver, Windows may use a generic audio driver with limited functionality or no functionality.
Signs Your Realtek Drivers Need Reinstalling
You may need to install or update Realtek drivers if:
- No sound is coming from speakers
- Headphones are not detected
- Audio crackles or pops
- Microphone is missing
- Realtek Audio Console is gone
- Front panel audio does not work
- Audio disappeared after a Windows update
- Device Manager shows unknown audio devices
Method 1: Install Realtek Drivers Through Windows Update
Windows 11 can sometimes install Realtek drivers automatically.
Steps
- Open Settings
- Select Windows Update
- Click:
- Check for updates
- Install available updates
- Restart the PC
Also check:
- Open:
- Advanced options
- Select:
- Optional updates
- Install available Realtek audio updates
Method 2: Identify Your Realtek Audio Hardware
Before downloading drivers manually, confirm your PC uses Realtek audio.
Using Device Manager
- Press Windows + X
- Select:
- Device Manager
- Expand:
- Sound, video and game controllers
Look for:
- Realtek(R) Audio
- Realtek High Definition Audio
- Realtek USB Audio
Check Hardware IDs
If you are unsure:
- Right-click the audio device
- Select:
- Properties
- Open:
- Details
- Choose:
- Hardware Ids
Realtek devices often contain:
VEN_10EC
10EC is the vendor ID for Realtek.
Method 3: Download Realtek Drivers From Your PC Manufacturer
This is usually the best method.
Laptop and motherboard manufacturers customize Realtek drivers for their hardware.
Recommended Sources
- Dell
- HP
- Lenovo
- ASUS
- Acer
- MSI
- Gigabyte
- ASRock
Using OEM drivers helps preserve:
- Speaker tuning
- Smart amplifiers
- Dolby Audio
- DTS enhancements
- Noise cancellation
- Headphone jack detection
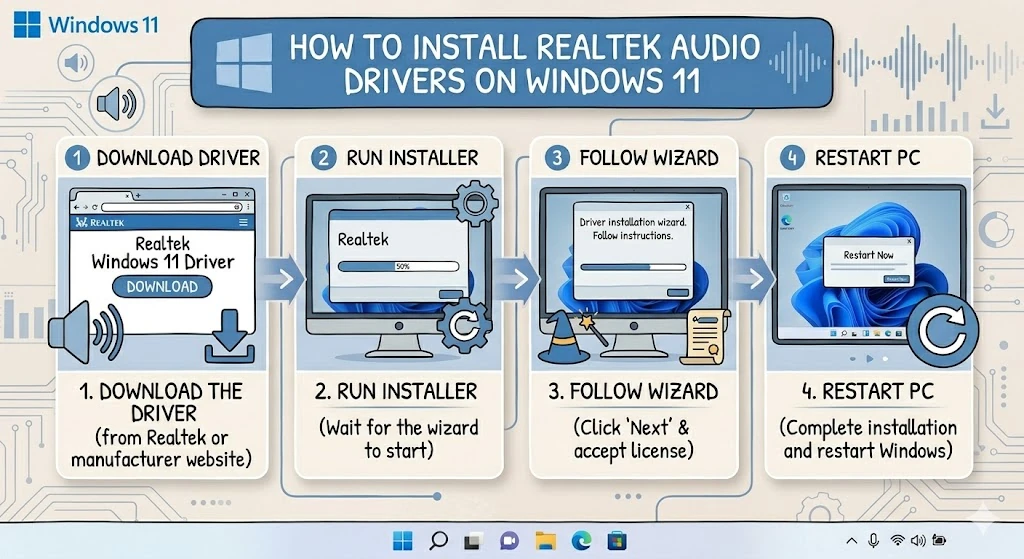
Method 4: Install Realtek Drivers Manually
If Windows does not install the driver automatically, you can install it manually.
EXE Installer Method
- Download the Realtek audio driver
- Run the installer
- Follow setup instructions
- Restart the computer
This is the easiest installation method.
ZIP or INF Driver Installation
Some Realtek drivers come as ZIP archives.
Steps
- Extract the ZIP file
- Open Device Manager
- Right-click the audio device
- Select:
- Update driver
- Choose:
- “Browse my computer for drivers”
- Point Windows to the extracted folder
- Click:
- Next
Windows should install the Realtek driver.
Method 5: Completely Reinstall Realtek Audio Drivers
If audio problems persist, perform a clean reinstall.
Remove Existing Drivers
- Open Device Manager
- Expand:
- Sound, video and game controllers
- Right-click:
- Realtek(R) Audio
- Select:
- Uninstall device
- Check:
- “Attempt to remove the driver for this device”
- Restart the PC
After rebooting:
- Windows may reinstall drivers automatically
- Or you can manually install the latest Realtek package
Fix: Realtek Audio Console Missing
The Realtek Audio Console is used to manage:
- Audio effects
- Equalizers
- Jack detection
- Speaker settings
If it disappears:
Try These Fixes
- Reinstall Realtek drivers
- Update through Microsoft Store
- Install OEM audio packages
- Restart audio services
Some older systems use:
- Realtek HD Audio Manager
instead of the newer console.
Fix: Headphones Not Detected
Realtek drivers control audio jack detection.
Solutions
Reinstall Drivers
This fixes most jack detection issues.
Check Audio Console Settings
Open Realtek Audio Console and verify:
- Front panel detection is enabled
Disable Audio Enhancements
- Open:
- Sound Settings
- Select your playback device
- Disable enhancements
Fix: No Sound After Windows 11 Update
Windows updates occasionally replace Realtek drivers with generic versions.
Possible Solutions
Roll Back Driver
- Open Device Manager
- Right-click:
- Realtek(R) Audio
- Select:
- Properties
- Open:
- Driver
- Click:
- Roll Back Driver
Install OEM Drivers Again
Manufacturer drivers often work better than generic Microsoft drivers.
Realtek Drivers and Gaming PCs
Gaming motherboards often include enhanced Realtek solutions such as:
- Realtek ALC1220
- SupremeFX
- Nahimic Audio
- DTS:X Ultra
Installing the proper drivers restores:
- Virtual surround sound
- Microphone enhancements
- Audio tuning
- Low-latency playback
Best Practices for Stable Realtek Audio
For reliable sound performance:
- Keep Windows 11 updated
- Use official OEM drivers
- Avoid random driver websites
- Update chipset drivers
- Restart audio services occasionally
- Remove old audio software conflicts
Final Thoughts
Installing Realtek audio drivers on Windows 11 can resolve missing sound, headphone detection problems, microphone failures, and poor audio quality. In most cases, downloading the correct driver from your laptop or motherboard manufacturer provides the best results.
Proper Realtek drivers restore full audio functionality, improve compatibility, and unlock advanced sound features that generic Windows drivers often miss.